Correct installation of the mixer in the wall
The mixer is such an obligatory attribute of modern life, without which it is difficult to imagine its existence. It's so nice to open a water tap at any time, set the right temperature, soak in warm water, take a relaxing bath. Often, at the time of purchasing a new home or installing a water heater, it becomes necessary to install this important element.

A mixer is a plumbing device that is designed to produce water of the required temperature.
Installation of the mixer in the wall can be carried out independently, which allows not only to save money, but also to enjoy the very process of work. To ensure the quality of the process, we should study the main stages of fixing the crane into the wall, as will be discussed below. Despite the variety of samples of mixers sold, the connection system for all remains the same.
Features selections
Before carrying out the basic work on the installation of a new crane, you must select a suitable sample. The main requirements for such products will be:

The device of the single-lever wall mixer.
- The weight of the finished attribute. A good quality product features a large mixer weight. Terms of using the device are determined by the thickness of the metal, it is worth noting that unnecessarily light bases should be avoided.
- Quality of metal. All cranes are made of brass or silumin, a special alloy of aluminum and silicon. It is known that the first version has a more massive coating and is distinguished by reliability, which can not be said for another metal. Mixers made from silumin, quickly fail, break and chip. They have a low price. Brass taps feature high viscosity of the alloy, which helps to make the base the strongest. Such products are practically not exposed to corrosion, have a solid appearance.
- Correspondence of parameters. When self-installing the product, it is important to follow the basic performance of the product. Any mixer, regardless of its quality, must correspond to the chosen place where it will be installed. The devices in question can be equipped with a crane or a lever, supply water to both the sink and the bathroom. When buying should pay attention to the price of the product, the high cost will indicate its good quality indicators.
The installation of the mixer is associated with its division into 3 categories:
- installation on the wall;
- accommodation in the body of the bath;
- fixation on a stand alone rack or shelf.
Dismantling the device
Before removing the old faucet, all water supply sources are closed, including a gas column, an electric water heater or a boiler. Remains of liquid from the device must be drained, after which the valve is unscrewed from the wall.
Such actions should be carried out carefully and carefully, so as not to damage the thread on the fitting. If this part breaks down, you will have to perform a complete repair of the whole wall block. Once the mixer is removed, the fittings are released from the old winding and paint layers.
Wall mounting
Installing the mixer in the wall helps to supply water to the washbasin and bath. In addition, having bought one tap, you can save your own budget significantly. You can place this important element anywhere.
In order not to be mistaken with the choice of a crane, appropriate measurements are made before acquiring it.

Determining the dimensions of the mixer.
The mixer should have a sufficiently long tube, allowing without any unnecessary problems to use the device above the sink and bath.
Most modern houses have a hidden water supply system, which involves a separate branch for the sinks and bathrooms. For this reason, the design in question is not currently used so often. However, when installing the mixer on the walls, it is necessary to follow similar schemes: the device is held on the branch pipes of the water supply system, and they, in turn, enter the partitions.
If the hidden eyeliner was installed independently, it should be clearly understood that the permissible height will be 1200 mm, the distance between the seaweeds is respectively 150 mm. These are standard indicators.
Main stages of placement
Before starting the basic work, you should prepare important devices and materials:
- a new mixer;
- adjustable wrench;
- car keys number 14 and number 17;
- gas key number 1;
- Teflon tape or natural fiber flax tow.
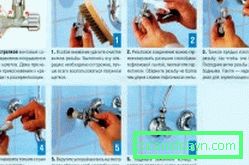
The installation of the mixer on the wall follows in a certain order:

Scheme of fixing the mixer to the wall.
- First, the operation of all the cranes is checked. Their handles need to be twirled along the movement of the clockwork. Locking devices that have not been switched on for a long time are capable of jamming, then such rotations can be stalled and the flow of liquid can not be completely blocked. To eliminate the shortcomings, they should be unscrewed and screwed repeatedly.
- Further installation of the mixer is associated with the dismantling of the old device: the nuts holding the valve on the eccentrics are twisted.
It is necessary to check the safety of the thread and the appearance of the device. Obsolete models may well have a normal state, especially if the metal is strong enough. The subsequent installation is associated with leaving the eccentrics in their places, which will save additional placement of new parts. They twist against the clockwise direction. However, when dismantling an old crane, there may be difficulties associated with the difficult output of eccentrics.
If such a problem arises, the connection point of the pipe should be checked by tapping the horn key. As a result, the mixer will lose its lime deposits. Also, the thread can be warmed by fire, for this quite often use a cigarette lighter.
Work with the eccentric should be very careful, because the old base is often quite fragile and at any time can break. If such a nuisance has occurred, the remnants of these details are removed from the wall by pliers or another tool. Fine fragments of brittle metal should not get into the water supply. Having finished these works, the considered thread of the branch pipe is well cleaned of dirt.

When mounting eccentrics on the threaded connection, a thin layer of wax should be wound.
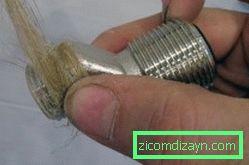
Next, new eccentrics are assembled. To begin with, a thin layer of wax or Teflon tape is wound on the threaded joint. Perform such actions in a certain sequence: from the edge of the fixed thread to the cut of this part. It is important to monitor the smoothness and density of the winding of the layer. New eccentrics are twisted in the course of movement of the watch. Their outlet pipes must be installed only in a horizontal position, the distance between the axes is 150 mm.
Such an installation can be simplified, for which the initial position and the number of screw turns of the first eccentric are fixed. Absolute coincidences will not exist, which determines the uniqueness of thread cutting, but the results of the work will be identical.
The installation of eccentrics and its correctness can not be estimated by examining their external indicators. For this reason, before completing the placement of the crane, it is healed by this part, combining the input of another device. The availability of the level of the crane and precise alignment gives an occasion for further installation. If there are shortcomings, one of the eccentrics is screwed into the desired position.
Then the mixer is installed. Decorating elements are fixed on eccentrics. Then, gaskets are put on the branch pipes, which provide reliable protection against water leaks. Nuts twist back, which creates favorable conditions for ease of operation.
The eccentric thread is treated with a stick or Teflon tape similar to the installation process.

Instructions for installing a wall-mounted mixer.
After this, the mixer nuts are tightly screwed. Initially, such actions can be done manually, at the final stage you can tighten them with their keys. In this case, it is not recommended to exert excessive efforts in such a case, which can damage the threaded joint.
After this, you can resort to installation of hinged structures in the form of a watering can, shower, hose, spout. Similar actions are carried out in the same way as tightening the crane nuts when connecting with eccentrics. Here, the following stages of installation are also indicated: protection of the pack and weak fixation.
The final stage of placing the mixer on the walls is checking its performance. It is important that during such tests, associated with a different pressure of water, no leakage occurs. The presence of such shortcomings will be associated with the re-installation. Such shortcomings are based on replacing the wax or tape on the thread.
Conclusion
Despite the seeming complexity of this work, the process of installing a faucet on the walls is quite simple. Such manipulations are within the power of even an inexperienced master.
Accurately following the indicated stages and observing accuracy and careful handling of metal, it is possible to fix this device in the required place for 1 hour. To prevent unexpected situations, read the instructions for the product before starting work.