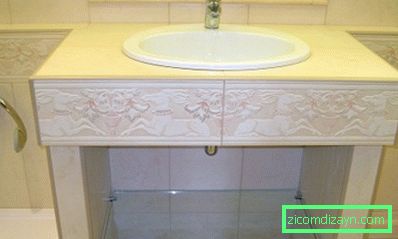
Nuances of making the table-top from plasterboard in the
Drywall is a versatile and practical finishing material. With its help you can create various designs in any room. One of these designs includes a countertop in the bathroom.

To produce the countertop in the bathroom, moisture resistant sheets of GLA are used.
Definition of dimensions
To make the countertops in the bathroom you should get the appropriate materials and tools. You will need:
- damp-proof plasterboard;
- a corner from metal;
- moisture resistant glue;
- decorative slats;
- moisture resistant plywood;
- flat board;
- primer;
- putty;
- liquid waterproofing;
- mixture for grouting joints;
- sandpaper;
- sealant;
- dowels;
- self-tapping screws;
- mosaic;
- tile adhesive;
- screwdriver;
- electric jig saw;
- marker;
- two spatulas: metal and rubber;
- cutters for splitting mosaic;
- brush.

Tools for working with plasterboard.
At the initial stage, calculations are carried out, due to which the dimensions of the table top are correctly determined. Since gypsum board is an easily deformable material, calculations should be aimed at ensuring convenient use of the structure being constructed.
That is, you just need to go to the place where it is planned to place a certain design (for example, a sink), and determine the most successful arrangement of the countertop (it will be convenient to tilt or wash). And if you had to tinker with ceramic tiles, it would be much easier to install a sink with a plasterboard.
In order to perfectly match the size of the countertop and sink in the bathroom, the following steps must be taken:
- The sheet of plasterboard is laid on a flat surface. On an uneven base, the GCR can crack.
- The shell turns upside down and fits in the middle part of the drywall sheet.
- On gypsum cardboard the contour of a sink is drawn.
- The sink is removed to the side.
- A hole is cut out along the circumscribed contour in the GKL with an electric jigsaw.
Processing and installation
Although the top of the gypsum board is made of a moisture-resistant material, it should be ensured that moisture does not get into the middle part of the sheet. It is clear that the drywall does not need to be processed in the lower and upper parts.
The moisture can only enter into the places where the cutout was made by an electric jigsaw. To prevent this phenomenon, use small wooden slats and special glue. After the adhesive composition dries, the sides of the cut edge are processed on the inner edges of the cut drywall.
All open edges of the table top are sanded with sandpaper.
After grinding, the surface is covered with a moisture resistant primer, which must penetrate the plasterboard as deeply as possible.
To install the countertops, side corners made of metal are used. One side of the corners is attached to the wall, the second - is the basis for the design itself. Self-tapping screws and dowels are used to secure the corners. After the final installation of the sink, the docking areas are filled with moisture-proof sealant.
Multi-level worktop

Scheme of the table top device made of GLA with mosaic finish.
With the help of gypsum cardboard it is possible to make and multilevel construction (usually it is 2-3 levels). To create it, you need to make the most accurate calculations. After all, the countertop should not spoil the bathroom interior.
The device of multilevel construction provides for a stronger frame, since the curbstones will be covered with plywood tops. And already it will be attached to the gypsum board structure.
Creating a countertop from two levels (plywood and drywall) involves the following works:
- a sink is placed on a plywood sheet;
- washing is done with a marker;
- on the drawn contour a hole is cut out.
The hole created in the plywood serves as a guide for cutting a hole of a similar size in a drywall. Cropped parts of gypsum board and plywood are sealed with a moisture resistant putty. The installed worktop is treated with a liquid waterproofing material, after drying, the finish of the structure is carried out.
Decorative finishing
In most cases, a mosaic is used for the facing of the plasterboard worktop, which is equipped with a bathroom. For reliable fixation of the finishing material, use a moisture resistant glue that is leveled with a notched trowel. Apply tile glue to that part of the countertop that is not occupied by a sink.
It is recommended to pre-arrange the cladding. This will allow:
- determine the width of the seams between the tiles;
- make an accurate calculation of the amount of mosaic;
- find the best option for laying, if you need to cut the mosaic;
- avoid too much material consumption.
To cut the mosaic, we use cutters that have sharp rollers. The laid mosaic is pressed against the table top by a flat board. The surface is leveled until the glue dries completely. After the tile glue has completely dried, a layer of paper is removed from the mosaic. At the final stage, grouting of joints between mosaic elements is carried out.