How to make a topiary from coffee
The coffee topiary can become a wonderful gift, a decoration of a dining table or an interior of a house. After all, it is so fragrant, beautiful, eco-friendly and also very simple to manufacture. In this material you will find the basic master class for making topiary of coffee for yourself with new hands and 50 photo-ideas for inspiration.
10 ideas
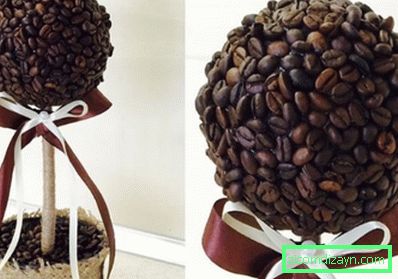
Idea. 1. Classical Topiary
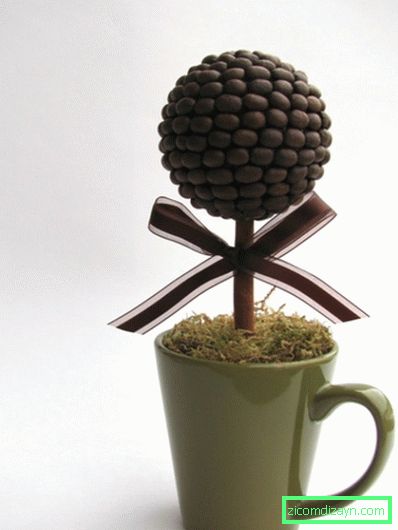
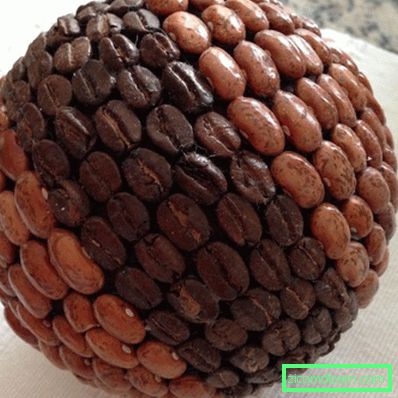
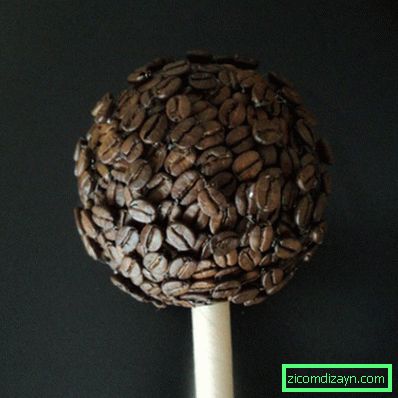
The classic topiari of coffee is round, without special embellishments, made up only of natural materials and in a neutral color scheme. Such a tree looks simple, but, perhaps, more elegant than others. At the end of the article you will find a step-by-step master-class on making this kind of topiary.


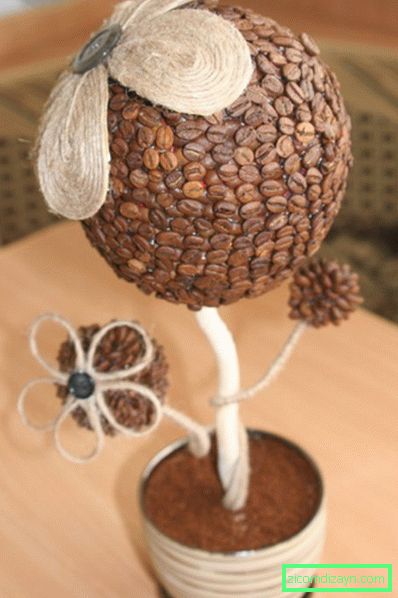
Idea 2. Flower tree
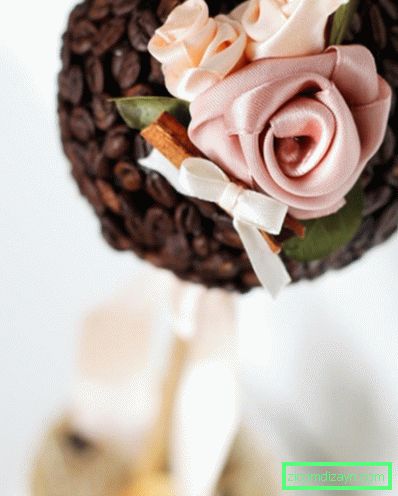
A coffee tree with flowers bloomed on it is a great idea for a woman's gift, for example, on March 8 or, say, Teacher's Day. And it looks good in the bedroom or the living room.


See also: Flowers from paper with their own hands - 4 master classes for beginners.
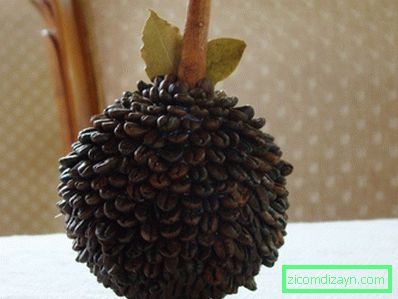
Idea 3. Fruit tree
If you decorate the topiary from coffee with dried citrus slices or decorative mini fruit, you will get an accessory for summer laying. However, even in the cold season it will be appropriate in the interior of the kitchen or dining room.


By the way, the coffee bowl itself can turn into an appetizing fruit as in the photo below.
Idea 4. A tree with butterflies and birds
Another idea of the spring-summer topiary of coffee is a tree with butterflies, dragonflies or birds sitting on it.


Idea 5. Christmas tree
Coffee tree in the form of a Christmas tree - a beautiful decoration for a festive table or New Year's decoration of the house. The workpiece can be bought or made by hand, folding thick paper into a cone and cutting off the excess.


Idea 6. Topiary "Money Tree"
A money tree made of coffee can be a great masculine gift. It is done in the same way as the usual topiary, the only difference is that first the balls are glued to the ball, then they are rounded open with a lightning and only then the ball is covered with coffee beans.


Idea 7. Coffee Valentines Day
Topiary in the form of a heart - an excellent gift for Valentine's Day and not only. The heart can be bought in ready-made form in a floristic store or made with your own hands from improvised materials.


How to make a topiary from coffee in the form of a heart with your own hands can be learned from the following video.
Idea 8. "The Burning Cup"
Such a topiary is often called a "cup-spill" or "a flying cup". Despite the seeming complexity, it is done very simply. To make the base of the spillage cup, wire and hot glue or a mounting foam are used. Having looked through the following video instruction, you will learn and visually see how to make a similar topiary with your own hands.


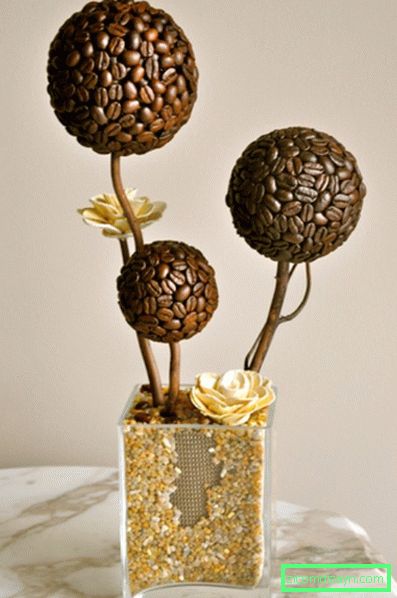
Idea 9. Double or triple topiary
Double and triple topiary require more effort, but the result is more impressive. Crowns can branch from one trunk or immediately "grow" from three trunks of different height and thickness.

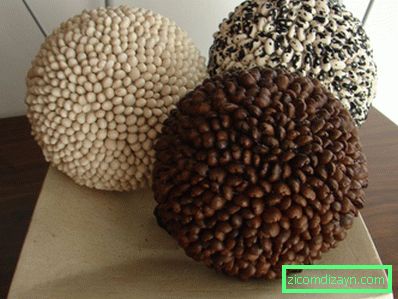
Idea 10. Decorative balls
Strictly speaking, this decoration can not be called a topiary, because it does not have a trunk and does not look like a tree at all. And yet, it looks no less beautiful, especially in combination with balls of beans, lentils and pumpkin seeds. The composition of the balls looks beautiful on a large dish or in a glass transparent vase, and you can decorate it with not only a dining room, but also a coffee table, a console in the hallway or a shelving in the living room. In the next photo slider you can learn the idea of combining balls of beans and coffee beans.


Master class for beginners
Most types of topiary are made according to the same principle. Having mastered our basic instruction, you can create a topiary for your taste.
Materials and tools:
- To create a crown:
- Coffee beans of one sort or several (200-300 g, depending on the size of the ball).
- Ball-base of foam plastic (sold in stores for creativity), floristic foam (can be found in a flower shop) or plastic (ball for a child's dry pool) with a diameter of about 8-12 cm. If desired, instead of a ball, you can use a workpiece in the form of a heart or any other shape.
- Decor (optional): cinnamon sticks, dried citrus slices, carnation sprouts, artificial flowers, satin ribbons, beads, etc.
- Acrylic paint is brown or a piece of brown cloth, which you can wrap a ball.

- For the trunk:
- A branch, a pencil or a stick. Determine the desired length can be a simple formula: the height of the pot + 1/3 of the diameter of the ball + the desired distance from the base to the crown.
- Decor (if necessary): paint, twine, satin ribbon or other materials with which you can wrap or paint the trunk.
- For foundation:
- Pot, cup or any other lovely capacity;
- Mounting mixture: cement, gypsum or alabaster. We recommend using alabaster, as it is easy to breed, it is available, and most importantly it dries quickly and does not crack.
- Materials for decoration and filling the pot. It can be the same coffee beans, small pebbles, and even better - dry moss.
- Auxiliary tools and materials:
- Hot glue gun and about three glue sticks or a transparent mounting glue "Titan".
- Scissors.
- Brush.
Instruction:
Step 1. First you need to do the preparation of the ball. Paint it with brown paint and leave to dry. At the same stage, you can paint the trunk and / or the pot.
Step 2. While the paint dries, sort the grains. This step is optional, but it is desirable if you want the crown to be neat and uniform. First, remove the broken and cracked seeds. The remaining ones can be divided into 4 groups:
- Beautiful grains of the same size - they will be on the most visible part of the topiary, that is, on its top.
- Round - for finishing the crown, it is better not to use them, because on the ball they will be higher than the main mass. If desired, they can be used to decorate the pot.
- Whole, but not very beautiful - they are best used for finishing the lower part of the crown.
- Small - they close well the small gaps between the grains.
Step 3. Now that the ball is completely dry, you can cut a hole in it for the barrel. To do this, first attach the barrel to the ball and circle its outline, then cut into it a hole 2-3 cm deep.
Step 4. We proceed to the design of the crown. You can use one of two techniques:
- Technique 1. Grains are glued in pieces and more often by the principle of bee honeycombs. Also, you can glue them up and / or down with a groove, vertically, horizontally or on an edge, alternate light and dark beans, if necessary, insert small / coarse grains or halves into the gaps. Do not forget that the most beautiful grains need to be glued on the top half of the ball. Below is a selection of photos of coffee topiarii, the grains of which are stacked in different ways (turn!).


- Technique 2. To use this technique, it is better to use non-hot glue, and installation transparent glue "Titan". Straight from the tube, squeeze a little glue onto the ball and let it be distributed in a small area (eg, 5 × 5 cm). Then sprinkle this sector with a handful of grains and start with your fingers to distribute and smooth the seeds along the ball. To prevent excess coffee from falling to the floor, place a container under your hands. Glue "Titan" unlike hot glue will allow you to move and compact the grains on the ball without fear of being burnt. And, besides, it gives more time for correction. Therefore, using it, you can not glue the grains individually, but sprinkle the balloon with whole handfuls of coffee, which greatly speeds up the process. True, the grain in this case will be stacked chaotically, and not in a certain order.

Whichever technique you choose, when the ball is almost completely covered with grains, leave a small area around the hole unformed. We will finalize it later, when the trunk will be installed.
Step 5. If you want to not just paint the trunk, but to decorate it with a twine or a satin ribbon, now it's time to do it.
- To wrap the trunk with a satin ribbon, it must first be wrapped in a double-sided scotch, not reaching the edges about 3 cm.
- The twine can be fixed with a double-sided adhesive tape or hot glue / Titan adhesive.

Decor trunk twine
Step 6. Insert the barrel into the ball and fix it with hot glue. Keep in mind that the adhesive quickly melts the foam, so in order to ensure that the hole does not get too deep, insert small pieces of paper into the hole together with the glue. Remember that the barrel should enter the ball approximately 1/3 of its diameter.
Step 7. Now you can glue the grains in the area around the trunk. If desired, to ensure that the crown of the coffee tree does not have any gaps, you can glue a second layer of grains onto the ball. Often a two-layered crown is first covered with grooves downwards (it is possible to use grains of poor quality), and then grooves upwards.
Step 8. Hooray, the coffee topiary is almost ready! It remains only to "plant" the tree in the pot. To do this, first make sure that there is no drainage hole in the pot. If there is a hole, fill it with hot glue. Next, dilute the cement or alabaster and immediately fill the mixture with a container, not reaching the edges by 2-3 cm. Insert the saplings into the center of the pot and hold for several minutes until the mixture hardens. Then leave the topiary for 12-24 hours, that is, until the "soil" is dry.
- As already noted, the best mixture for making topiary is a mixture of alabaster. It is diluted as follows: water is poured into the pot, not reaching 2-3 cm to the edge, then water pours into the bowl, then alabaster is gradually poured into the water. The mixture should be stirred continuously until the consistency of thick sour cream is obtained.

Step 9. When the base of the topiary dries, proceed to decorating it. Alabaster can make the same coffee as in our master class, cover with dry moss, sisal, fill the pot with pebbles, glass pebbles or beans. Finally, add the last touch - a bow of satin ribbon.

Also, we offer to watch a video master-class on making topiary from a plastic ball for a dry pool.