Painting of glasses and ceramic mugs - 3 master classes and
In this material we will tell you and show how you can simply and beautifully paint pottery from glass or glass with your own hands, even if you do not know how to draw at all, but want to decorate cups or glasses for yourself or make an original gift from them.
Master-class №1: Watercolor on a mug of nail polish - decor in 5 minutes
Let's start, perhaps, with the simplest, fastest and most accessible drawing technique with our own hands, which will be very creative and stylish.
What will be required:
- Liquid for removing varnish, as well as cotton wool and sticks - for degreasing the surface and correcting the pattern;
- Nail Polish - 1-3 pcs. different colors (can be hardened);

- A container with warm water - a plastic container or a plastic / ceramic plate will fit;
- Toothpick - in order to stir lacquer in water;
- Napkins - in order to wipe off excess water.
Drawing technique:
- Degrease the surface with alcohol or acetone;
- In a container with warm water, add a little varnish. If you want to make a more transparent coating, then add only 2-3 drops, and to create a more saturated shade - 5 or more.

After the first varnish, immediately add a few drops of the second, and then the third varnish (if desired).

- Now you need to take a toothpick and lightly mix the paint as shown in the photo above in the lower right corner;
- Finally, we lower the cup into the water with the paint - you will see how the lacquer immediately covers its surface with "marble" divorce;
- If necessary, correct the resulting pattern on the mug with a nail polish remover, and then let it dry for 2 hours.

Well, that's all, the decor is ready!

If you wish, you can add painting with contour or acrylic paints, and write special greetings, amusing inscription, monogram, etc., with special markers for ceramics. But keep in mind that such dishes should not be washed in a dishwasher and heated in a microwave oven.
Despite the fact that this is a master class on mural painting of a ceramic mug, you can make drawings on glasses in the same way.
Master-class №2: Painting mugs with a joke
This master class is great for sharing creativity with kids, as it is simple and, at the same time, fun. This time we will draw only such funny drawings at the bottom of the cup.
What will be required:
- Wadded disks and any degreaser - ethyl alcohol, nail polish remover or white spirit;
- Acrylic paint - for painting the bottom. In this example, black paint is used, but you can choose any color;
- Marker for ceramics and glass of contrasting color or acrylic or contour paints for painting utensils;
- Scotch tape - usual or painter.
Drawing technique:
- Degrease the bottom of the mug or glass;
- We glue the adhesive tape as shown in the photo below;

- Further on, on the bottom of the mug, apply a dense layer of paint;

- After all the bottom is painted over, remove the adhesive tape and put the mug in the oven to bake at a temperature of 150-170 degrees 30-35 minutes. Then let the mug cool down;
- As soon as the mug cools after baking, smooth the edges of the painted bottom, for example, with a knife as shown below in the photo;

- And now it's time to paint. The drawing can be applied with contour or acrylic paints or a special marker for ceramics as in this master class. Felt-tip pens and markers are not necessary to bake, they dry for 24 hours, but acrylic paints can be dried either naturally, leaving to dry for 1 day, or bake at a temperature of 150-170 degrees for about half an hour.


And here are other ideas for drawings on the bottom of the cup.

Master class №3: Spot painting of glasses and mugs
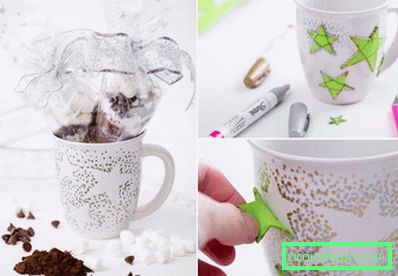
The technique of point painting (point to point or peak) - will be somewhat more difficult, and yet, anyone can cope.
What will be required:
- Contoured paints for glass and ceramics, acrylic paints with a small brush or marker for ceramics;
- Degreaser and wadding disks for degreasing, as well as cotton buds to correct the pattern.

Technique of drawing:
- Degrease the surface of the cup or glass;
- Draw a sketch of the desired pattern or image with your own hands or print the picture in the desired size.
- In the case of painting glasses from glass, the sketch must be pasted with adhesive tape on the back;
- If you paint on ceramics, then with the help of a sketch you will be able to outline the main contours and lines along which the drawing will be built;
- And you can also make a template and template (with your own hands or print on a printer) or use an adhesive tape.


- First you need to test all the tubes and make sure that the colors are not too liquid and not too thick - they should be squeezed out easily, but not a puddle. Then practice on a sheet of paper to put small, medium and large diameter points with the same pressing and spacing. (see the photo below). The distance between the points should not only be the same, but also the minimum;

- As soon as the points become the same size, start drawing, keeping the distance from the edge of the circle about 2 cm.
The basic principles of dot mugs:
- As it was already said: in one line the points should be the same in diameter and volume (if you draw with contours);
- It is especially important to maintain the same and optimal distance. It must be such that the points are distinguishable, but not disjointed, so that they form a single line. In this case, keep in mind that the larger the point, the greater the distance between them is permissible, and vice versa, the smaller the point - the smaller the interval should be maintained;
- First you need to draw large, that is, the main parts of the picture, arranging the entire composition, and only then draw the details.
- The finished drawing needs to be fixed. For this, the mugs should be put in the oven for half an hour to bake at a temperature of 150-170 C. Markers most often do not require baking and dry up for 1 day.
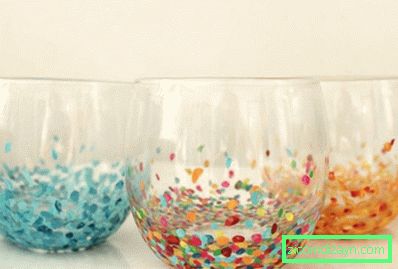
You can draw not only points, but peas, which can be applied with acrylic paint with the eraser from a pencil, a cotton swab or a brush. Here are some interesting ideas for painting glasses and mugs in peas.


Pay also attention to our guide to the site in the section Design and decor of the kitchen - a guide to the site.


